
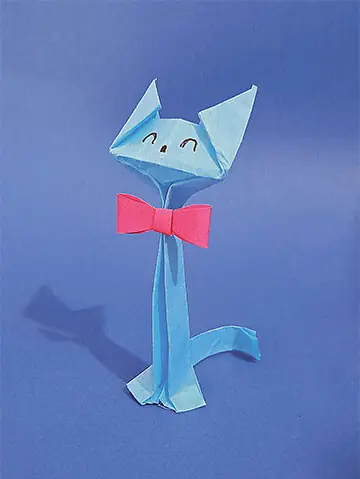
Paper is truly amazing. The more you discover the many ways it can be folded and transformed, the more it surprises you. Today, we are making a nifty little origami cat. The steps may look a little complicated at first, but once you get started, you’ll find they’re not as difficult as they seem. And trust me, the result is absolutely adorable!
Let’s get started.
Things you need:
-
Paper, colour or patterned
-
Ruler (for beginners)
-
Scissors
-
Marker
Directions:
-
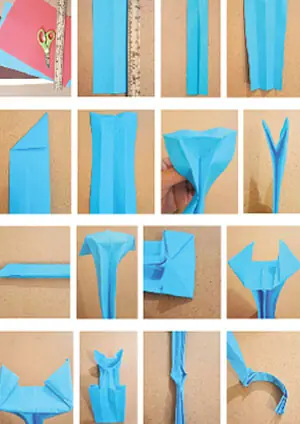
Cut a rectangle measuring 8 inches by 4 inches from coloured paper. Fold it in half lengthways, then unfold it to create a centre crease; picture 2.
-
Fold one edge of the already folded paper inwards to meet the centre crease. Repeat the step on the other side, so both edges meet in the middle. Crease well, then unfold both sides; pictures 3 and 4.
-
Open the paper completely. You should now have three parallel crease lines running along the length of the paper: one in the centre and one on each side.
-
Fold the paper in half again along the original centre crease. Fold the top corner inwards to form a diagonal crease, then press firmly; picture 5.
-
Unfold the corner, then open the paper completely. You should now see two diagonal creases at the top, forming a triangle. These creases will become the cat’s head. Pinch the point where the two diagonal creases meet, as this will become the cat’s neck; pictures 6 and 7.
-
Bring the top of the paper together and gently push the triangular flap inside. Press the paper flat, making sure the pointed corner stays facing upwards; pictures 8 and 9.
-
Gently open the folds of the head. Fold the two top corners inwards to form the ears, then press firmly to make crisp creases; pictures 10 and 11.
-
Turn the head over and fold the ears upwards. Press along the creases to shape them. Your cat’s head is now almost complete; pictures 12 and 13.
-
Turn the cat over and fold the body in half upwards. Press firmly to make a crease in the folded part. Turn it over again, and gently twist along the crease so that the upper section forms the body and the lower section becomes the tail; pictures 14 and 15.
-
Wrap the tail around your finger and gently curl it to give it shape; picture 16.
Your adorable origami cat is now complete; you can tie a bow, draw eyes or put any other ornaments if you want.
The writer can be contacted at ithecraftman@gmail.com
Published in Dawn, Young World, July 4th, 2026


