

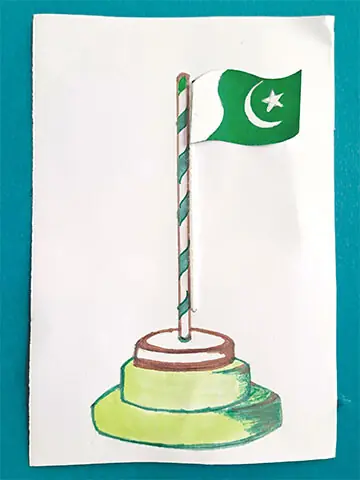
Though Independence Day has passed, the celebrations can still go on. So let’s hoist the flag and celebrate our freedom!
This simple yet fun craft lets you make your very own mini flagpole, complete with a flag that can be raised and lowered. It’s easy to make using a few simple materials you can find around the house.
Let’s get started:
Things you need:
-
White card sheet or white A4-sized paper
-
Coloured markers or colour pencils
-
Scissors
-
Pencil
-
Ruler
-
White string, around 12 inches long
-
Hot glue or white glue
Directions:
-
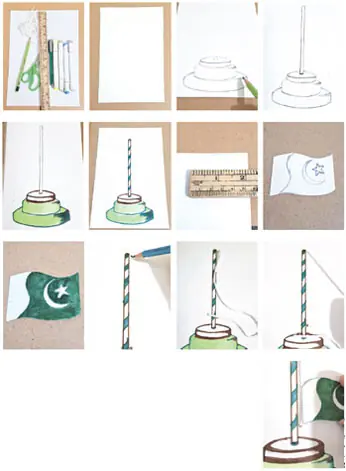
Cut a white sheet of paper 10 inches long and 6 inches wide, in portrait orientation (picture 2).
-
Draw a simple pole base in the centre. You can make it three steps or just one (picture 3).
-
Draw a flagpole rising from the centre of the base (picture 4).
-
Colour the base using colours of your choice (pictures 5 and 6).
-
To make the flag, cut a piece of white paper 2.5 inches wide and 1.5 inches long (picture 7).
-
Draw a crescent and star, just like those on our national flag, and colour them in (pictures 8 and 9).
-
Poke two small holes in the sheet, one beside the top of the pole and the other near the bottom right side (picture 10).
-
Thread a piece of string through the top and bottom holes and tie a knot at the back of the sheet to secure it (pictures 11 and 12).
-
Glue the white side of the flag onto the string and let it dry completely.
-
Once it is dry, you can either paste it onto another sheet of card or leave it as it is.
Your flagpole is ready! Give the string a gentle pull and watch the flag go up!
The writer can be contacted at ithecraftman@gmail.com
Published in Dawn, Young World, August 15th, 2026